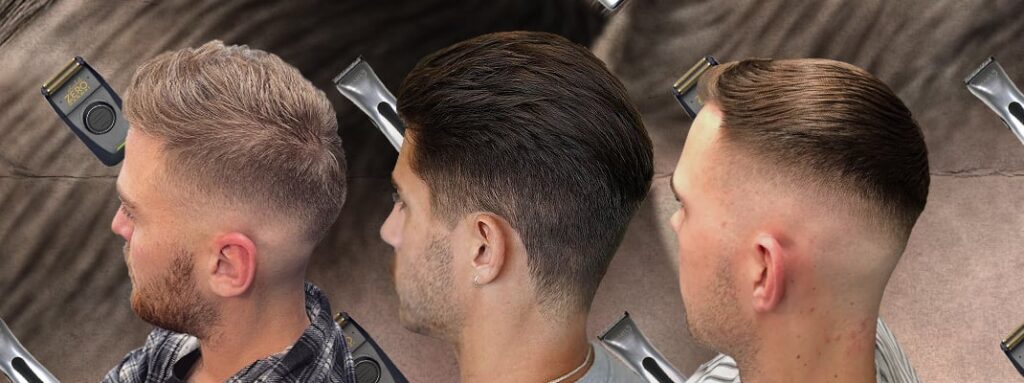
A taper fade is one of the sharpest and most stylish haircuts, but small mistakes can ruin the look. Uneven fading, harsh lines, or poor blending can make your haircut look messy instead of clean and polished. These common taper fade mistakes are easy to fix with the right techniques.
Your own hair or fixing a bad fade from the barber, this guide will help. We’ll cover step-by-step solutions to smooth out imperfections, blend your fade seamlessly, and achieve a pro-level finish every time.
Contents
Common Taper Fade Mistakes and Their Causes
A taper fade haircut is one of the most stylish and versatile haircuts, but getting it right takes practice. Many people struggle with uneven fades, harsh lines, or poor blending, making the haircut look messy instead of sharp.Most taper fade mistakes are easy to fix once you know what causes them.
1. Uneven Fading
An uneven fade creates patchy spots and ruins the smooth transition. This usually happens when you rush the process, use the wrong clipper guard, or apply uneven pressure. The key is to take your time and check your work from different angles.
2. Harsh or Visible Lines
If you see a strong line between different hair lengths, your blending needs work. This happens when you don’t properly transition between clipper guards. To fix this, use a fade brush and go over the line with a slightly open clipper.
3. Over-Tapering or Under-Tapering
Cutting too high or too low can throw off the entire look. Over-tapering makes the fade disappear too soon, while under-tapering leaves too much hair at the bottom. Always map out your fade before starting.
4. Blending Issues
Poor blending makes the fade look choppy. This happens when you don’t gradually adjust clipper guards or use inconsistent strokes. Slow, steady movements and proper guard adjustments help create a smooth fade.
Step-by-Step Guide to Fix Uneven Fading and Harsh Lines
A taper fade should have a smooth, seamless transition between hair lengths, but uneven fading and harsh lines can ruin the look.
If your fade appears patchy or has visible lines, don’t worry it’s fixable! With the right tools and techniques, you can correct these mistakes and achieve a clean, professional fade.
1. Identify the Problem Areas
Before fixing your fade, examine it in good lighting and use a handheld mirror to check the back and sides. Look for uneven spots or harsh lines that need blending.
2. Adjust Your Clipper Settings
Use a slightly open clipper (adjusting the lever halfway) to soften harsh lines. Start with a higher guard number and gradually work your way down to ensure a smooth blend.
3. Use the Fade-Down Method
Instead of fading up, try fading down. This technique helps control the transition between lengths better and reduces the risk of harsh lines.
4. Blend with a Fade Brush and Light Strokes
A fade brush removes excess hair and helps you see blending mistakes clearly. Use gentle, flicking motions with your clippers to blend lines smoothly.
5. Cross-Check and Refine
Look at your fade from different angles and make small adjustments as needed. If a line is still visible, use a trimmer or blending scissors to soften it further.
Correcting Over-Tapering, Under-Tapering, and Blending Issues
A taper fade should be balanced and well-blended, but mistakes like over-tapering, under-tapering, or poor blending can throw off the look. If your fade seems too high, too low, or choppy, stress, these are common problems with simple fixes.
1. Fixing Over-Tapering
Over-tapering happens when you cut the fade too high, making it disappear too soon. The best solution is to let the hair grow out slightly before reshaping it. If you need an instant fix, use a longer clipper guard at the top to create more contrast and restore the fade’s balance.
2. Correcting Under-Tapering
If your taper fade looks too low or unfinished, it’s likely under-tapered. To fix this, use a shorter guard and gradually work your way up. Blend smoothly between lengths to extend the fade higher without creating a harsh transition.
3. Improving Blending
Blending issues cause choppy or uneven transitions. To smooth them out, use a fade brush to remove loose hairs and go over the fade with light, flicking motions. If needed, use a clipper with an open lever or blending scissors to soften any harsh lines.
Pro Tips for a Flawless Taper Fade Every Time
A taper fade is a timeless and stylish haircut, but getting it perfect takes practice. Whether you’re cutting your hair or refining your barbering skills, a few expert tricks can make all the difference.
1. Use the Right Tools
A high-quality clipper with adjustable guards is a must for a smooth taper fade. Sharp blades ensure a clean cut, while a fade brush helps remove loose hairs and reveal blending mistakes.
2. Take Your Time
Rushing leads to uneven fades and harsh lines. Work in small sections, making gradual adjustments. Always check your fade from different angles using a handheld mirror.
3. Master the Blending Technique
For a flawless transition, use the fade-down method,start with a longer guard and gradually go shorter. Light, flicking motions with your clippers help blend the fade smoothly.
4. Pay Attention to Symmetry
A great taper fade looks even on both sides. Cross-check your work frequently, and make small corrections as needed to keep the fade balanced.
5. Finish with Detail Work
Use a trimmer to clean up the neckline and sideburns for a sharp, polished look. A touch of styling product can enhance the fade and keep it fresh.
Conclusion
Fixing taper fade mistakes is easier than you think. With patience, the right tools, and a little practice, you can master a clean, professional look. Remember to blend carefully, fix harsh lines, and take your time for the best results. A great taper fade boosts confidence, so keep refining your skills and enjoy a sharp, polished haircut every time.


